When you run a business website, you may wish to track if a user had an interaction with your website that leads to conversion. Some of the most common events you may want to track are Phone Calls, Email Clicks, and Form Submission. The best way to track events by using the Google Tag Manager.
How to Install Google Tag Manager Code on Your Website
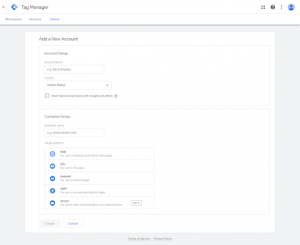
In the first step login to Google Tag Manager and create an account. Fill in the account name, select your country and add your domain in the container name. Choose the web in the target platform. Accept the service Google Tag Manager Terms of Service Agreement and hit Yes.
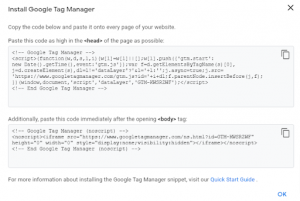
After the above process, you will get the Google Tag Manager Code. Add the first code in the <head> part of your website and the second code in the <body> part as per the instruction.
Configure Built-in Variables in GTM
After the code installation, we need to configure built-in variables in Google Tag Manager. We need to add the click variables which are not available in the default setup.
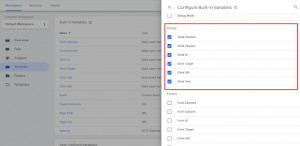
After this process now you can set up different events in Google Tag Manager. Here are the examples to set up the most common event tracking.
Phone Calls Event Tracking in Google Tag Manager
Here are the steps to follow Track Phone Calls Events
Phone Calls Tag Setup
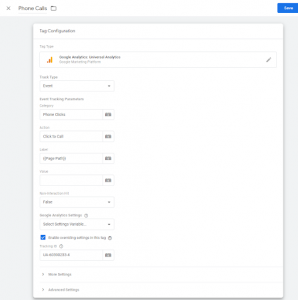
- Create a new tag named “Phone Calls”.
- In tag configuration choose the tag type “Google Analytics: Universal Analytics”.
- Choose an event in track type.
- In Event Tracking Parameters add Category = Phone Clicks, Action = Click to Call, Label = {{Page Path}}
- In Google, Analytics Settings choose to Enable overriding settings in this tag and put your Google Analytics Tracking ID
Phone Calls Trigger Setup
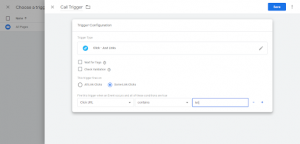
- Go to choose a trigger.
- Click on add new trigger.
- Name the trigger “Call Trigger”
- Choose Just links in trigger type
- Choose some links in trigger fires on
- In Fire this trigger when an Event occurs and all of these conditions are true
Click URL> contains > tel:
Email Click Event Tracking in Google Tag Manager
Here are the steps to follow Track Email Click Events
Email Tag Setup
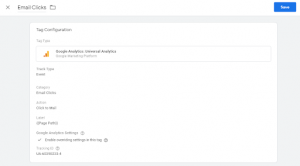
- Create a new tag named “Email Clicks”.
- Choose tag configuration tag type = “Google Analytics: Universal Analytics”.
- Select the event in track type.
- In Event Tracking Parameters add Category = Email Clicks, Action = Click to Mail, Label = {{Page Path}}
- Put your Google Analytics Tracking ID again In Google Analytics Settings
Email Click Trigger Setup
- Choose a trigger.
- Select add a new trigger.
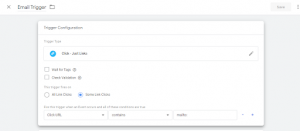
- Name the trigger “Email Trigger”
- Choose Just links in trigger type
- Choose some links in trigger fires on
- Fire this trigger when all of these conditions are true
Click URL> contains > mailto:
Contact Form 7 Event Tracking in Google Tag Manager
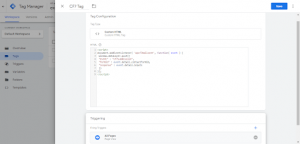
To track contact form 7 form submission we need to add contact form 7 listener tag in GTM. For this select a custom HTML tag in Tag configuration and add the following code.
<script>
document.addEventListener( ‘wpcf7mailsent’, function( event ) {
window.dataLayer.push({
“event” : “cf7submission”,
“formId” : event.detail.contactFormId,
“response” : event.detail.inputs
})
});
</script>
And in the trigger choose the trigger “All Pages”
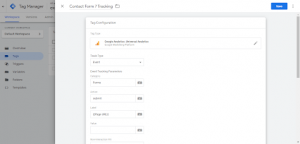
Contact Form 7 Tag Setup
- Create a fresh tag named “Contact Form 7”.
- Select tag configuration type = “Google Analytics: Universal Analytics”.
- Select track-type = Event.
- In Event Tracking Parameters add Category = Forms, Action = submit, Label = {{Page URL}}
- Put Google Analytics Tracking ID In Google Analytics Settings.
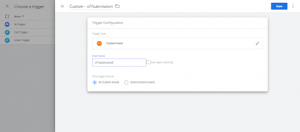
Contact Form 7 Trigger Setup
- Choose a trigger.
- Add a new trigger.
- Name the trigger “Custom – cf7submission”
- Choose a custom event in trigger type
- Select event name > cf7submission
- Select all custom event in trigger fires on
After setting up the required event tag we need to publish this tag to work properly. For this hit the Submit Button on the top right corner> click publish and click skip to continue. Now track these events in Google Analytics we need to set up Goals.
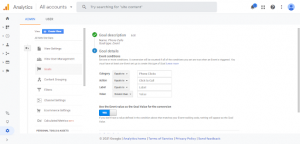
Phone Calls Goal Setup in Analytics
Here are the steps to setup Phone Calls Goal
- Add New Goal
- Add Name = Phone Calls
- Select Goal Type = Event
- Add this in Goal Condition
Category = Phone Clicks
Action = Click to Call
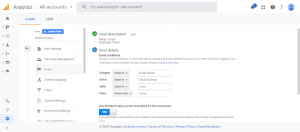
Email Goal Setup in Analytics
Here are the steps to setup Phone Calls Goal
- Add New Goal
- Add Name = Email
- Select Goal Type = Event
- Add this in Goal Condition
Category = Email Clicks
Action = Click to Email
Contact Form Goal Setup in Analytics
Here are the steps to setup Phone Calls Goal
- Add New Goal
- Add Name = Contact Form Lead
- Select Goal Type = Event
- Add this in Goal Condition
Category = Forms
Action = submit
Conclusion
That’s it you can now easily track your conversion in Analytics. Hope this Google Tag Manager event setup guide will help you to track events and conversion easily. If you still have any issues then contact our SEO professionals at White Label SEO Lab. We have a skilled expert that helps digital marketing agencies in getting the top position in search engines for their clients.
I am 10-year experienced digital marketing expert with experience of managing Local SEO, PPC, and Social media accounts.
